
Zircon3D 3.0 – New Room Visualizations, Electrical Routing, Solar Arrays & More
-
Zircon3D 3.0 introduces new capabilities for room-level visualization, electrical and energy-system modeling, dashboard monitoring, object placement, and Designer productivity.
This release significantly expands what can be represented inside a Zircon3D project, from room-specific sensor conditions and historical trends to electrical routing, rooftop solar equipment, custom room geometry, and embedded 3D building views.
New Features
Data-Driven Room Box Views
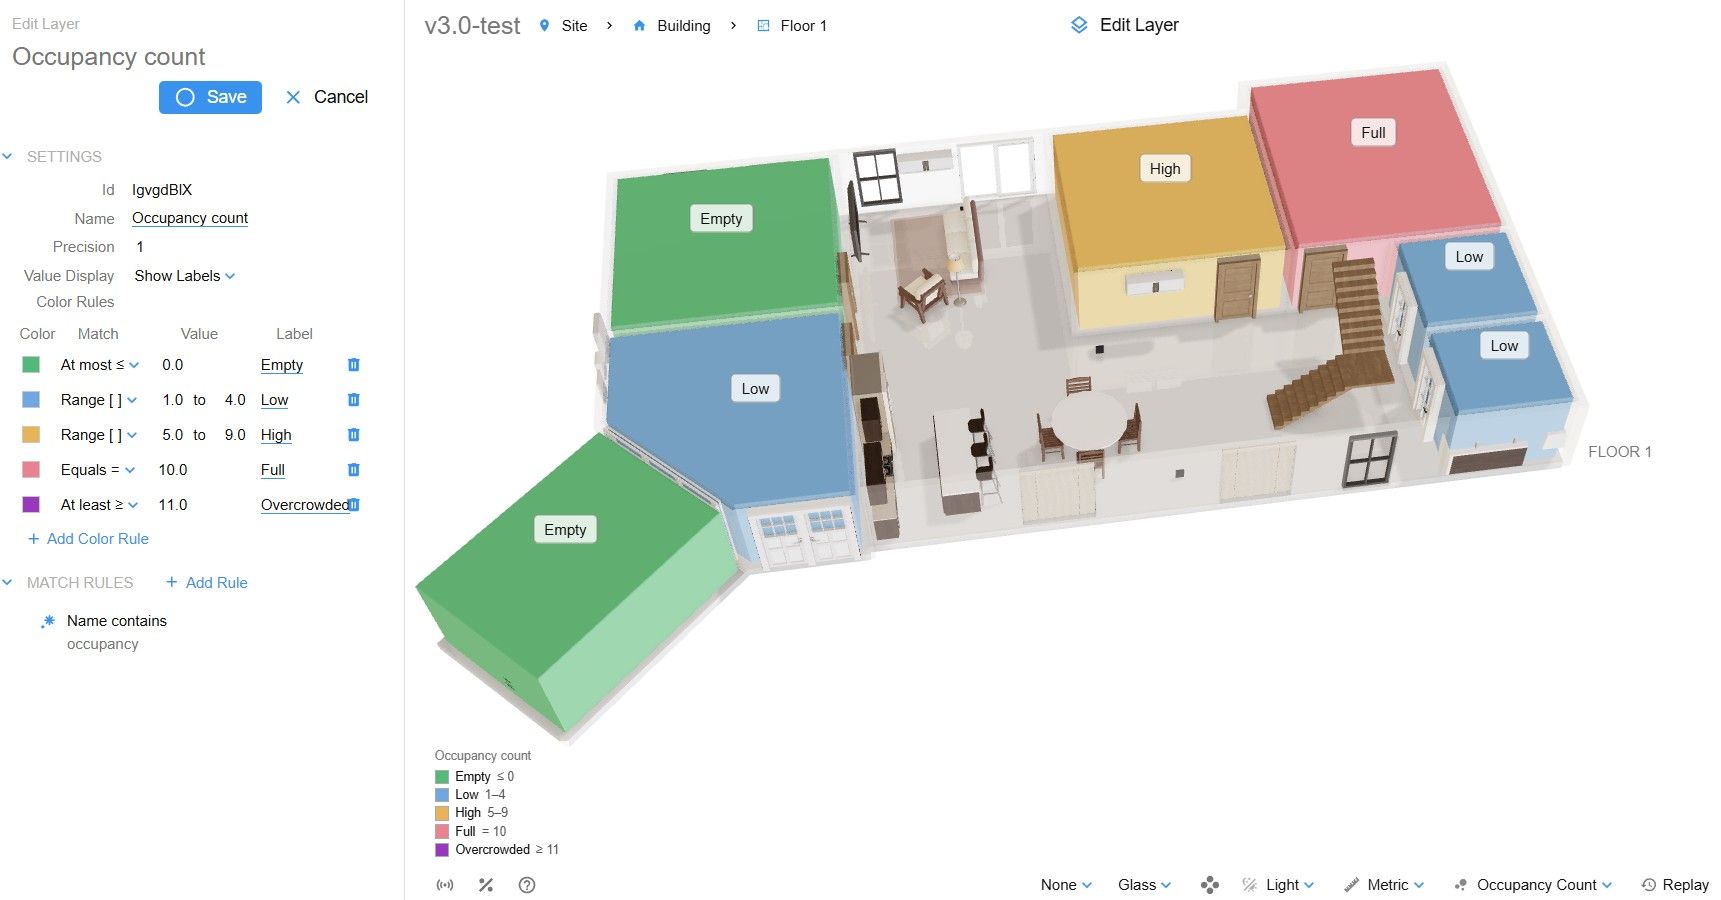
Room Box View can represent values such as occupancy, temperature, humidity, availability, alarms, or other room-level states by changing a room’s color based on incoming data. You can also disable Box View for individual rooms, such as hallways or utility areas, to keep the visualization focused.
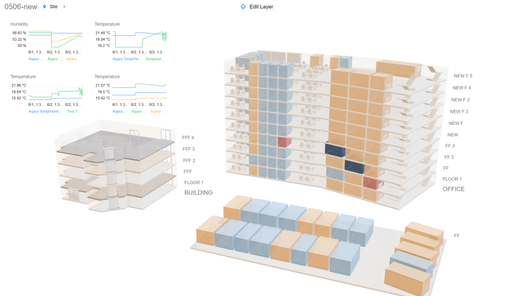
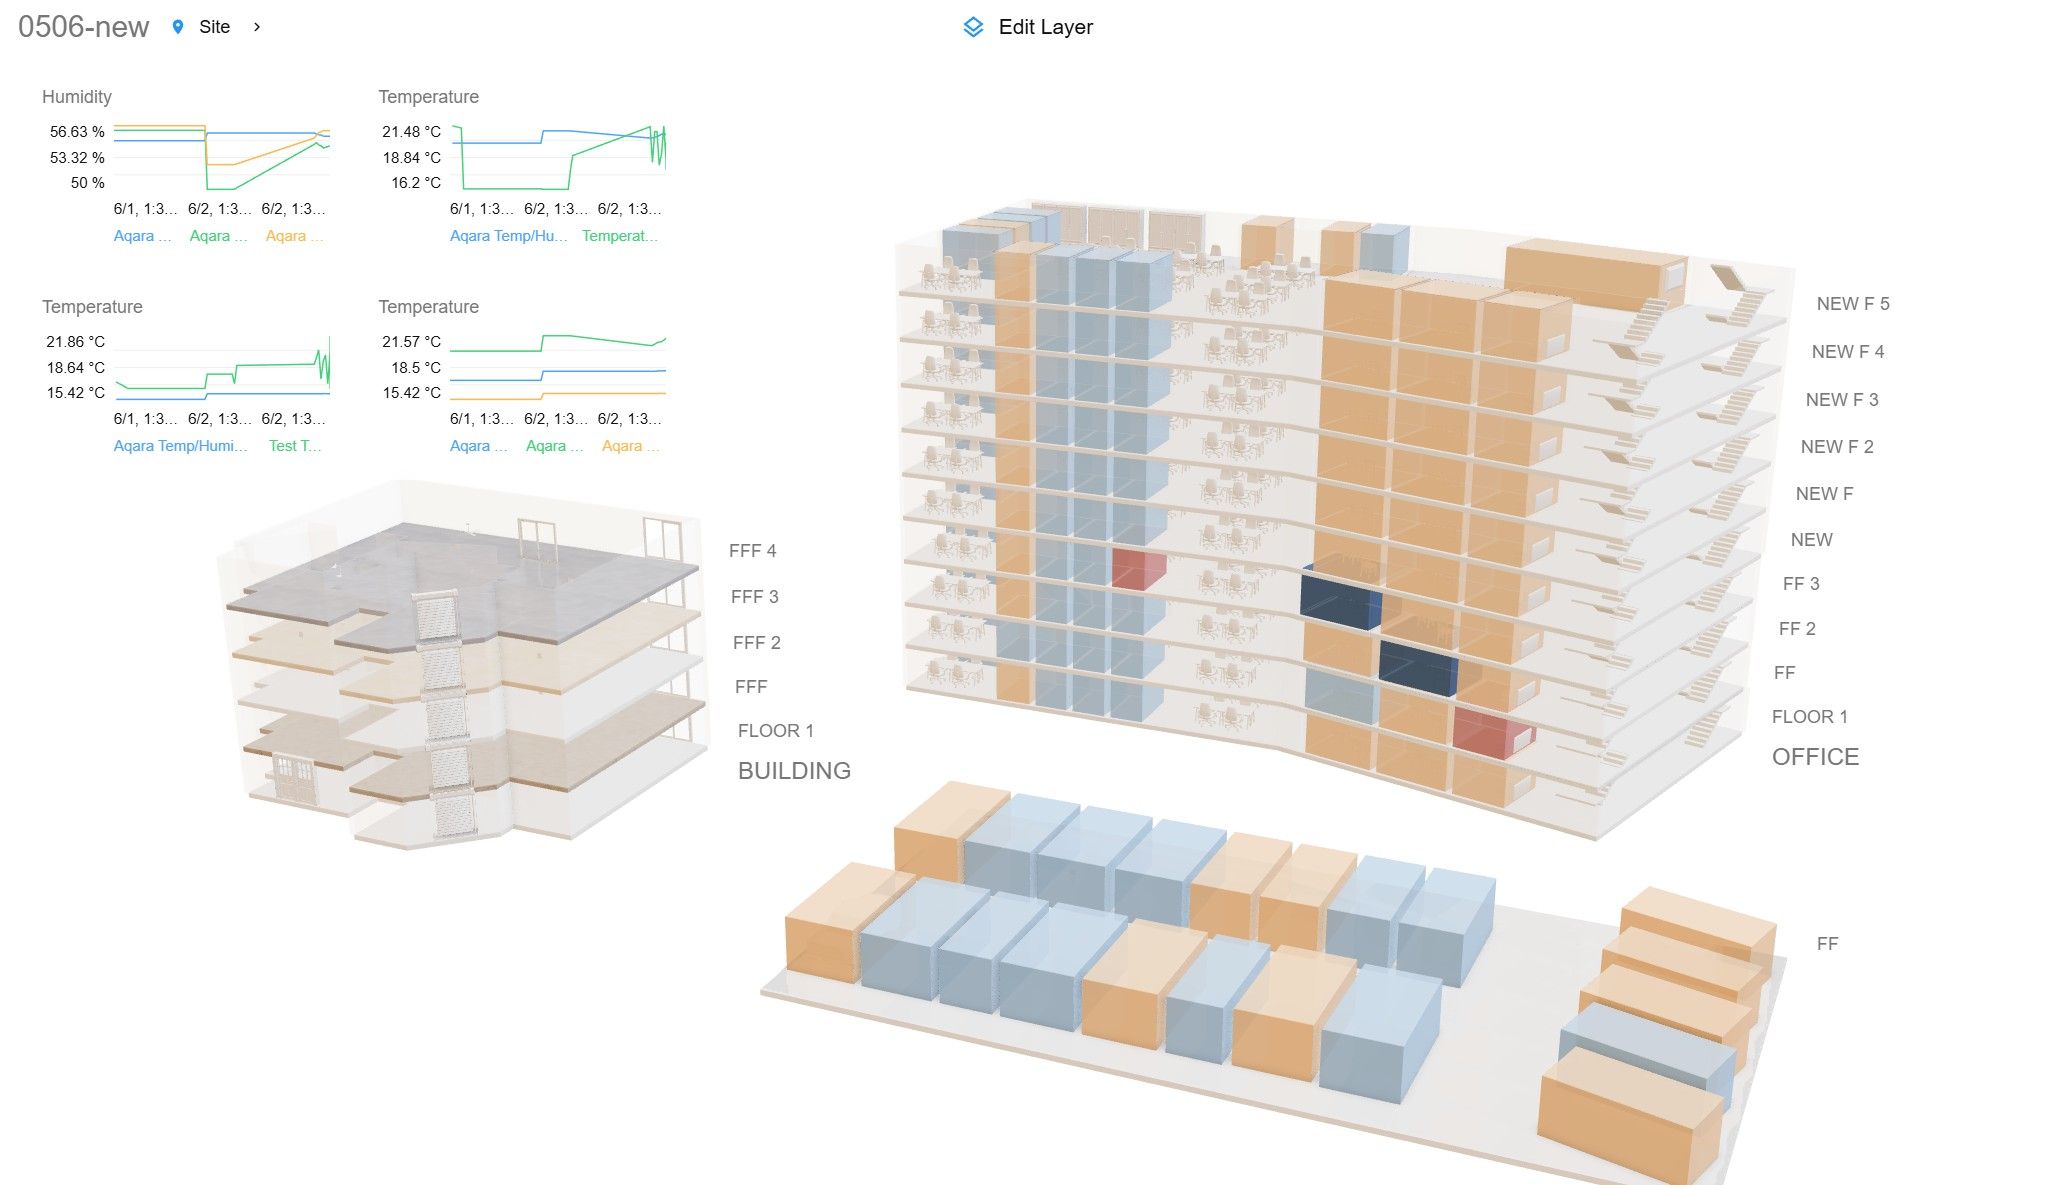
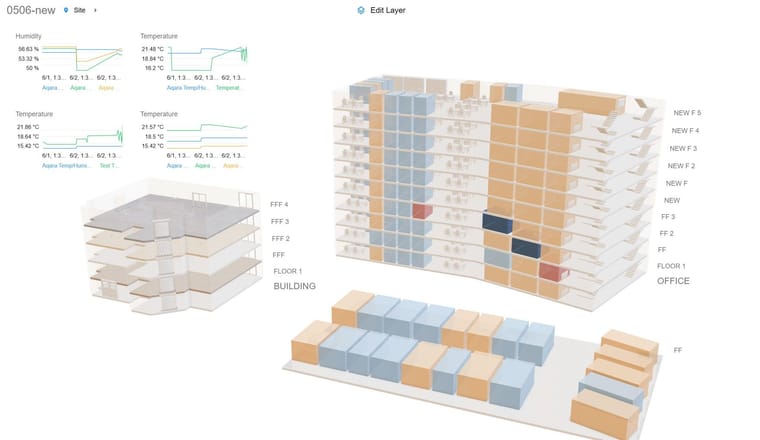
At the building level, Room Box View provides a quick visual overview of conditions across multiple floors, using color rules to highlight occupancy, temperature, alarms, or other operational states. This makes it useful for offices, facilities, and other larger commercial environments.
To use it: Create a Room Box View in Layers and configure its color rules. In Edit Building, select a room and drag a sensor into Data Links. Then open Preview and select the Room Box View from the visualization dropdown in the status bar.
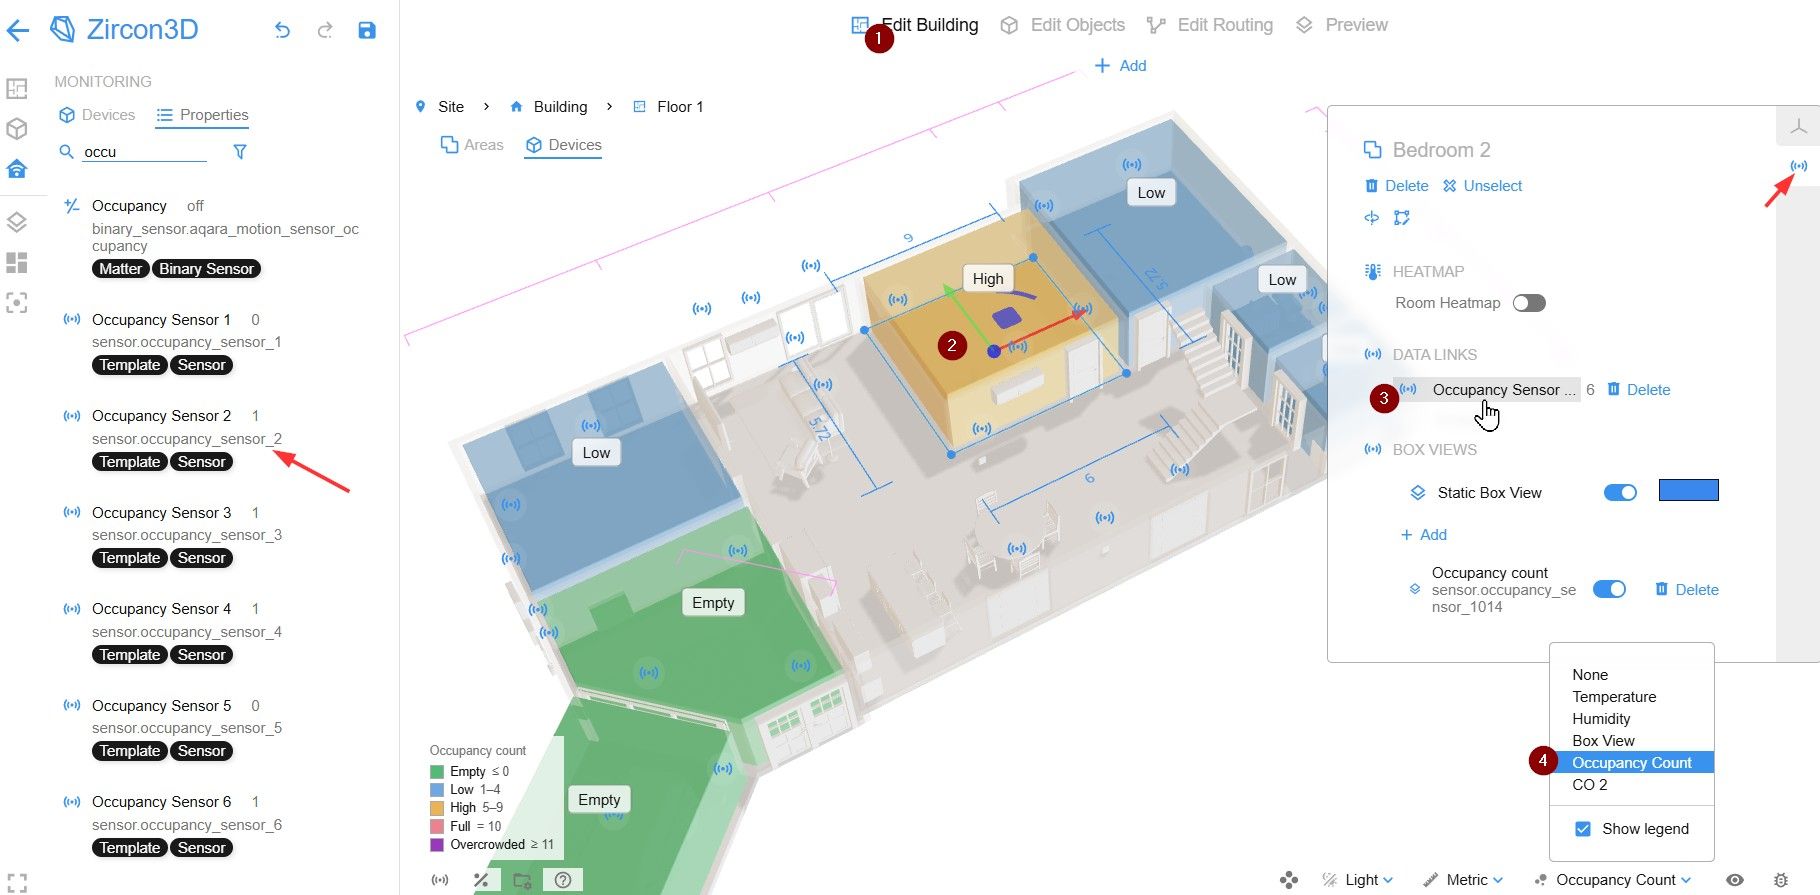
Tip: In View Settings, you can adjust the Room Box Opacity or hide the Room Box card for a cleaner view.Room-Level Heatmaps
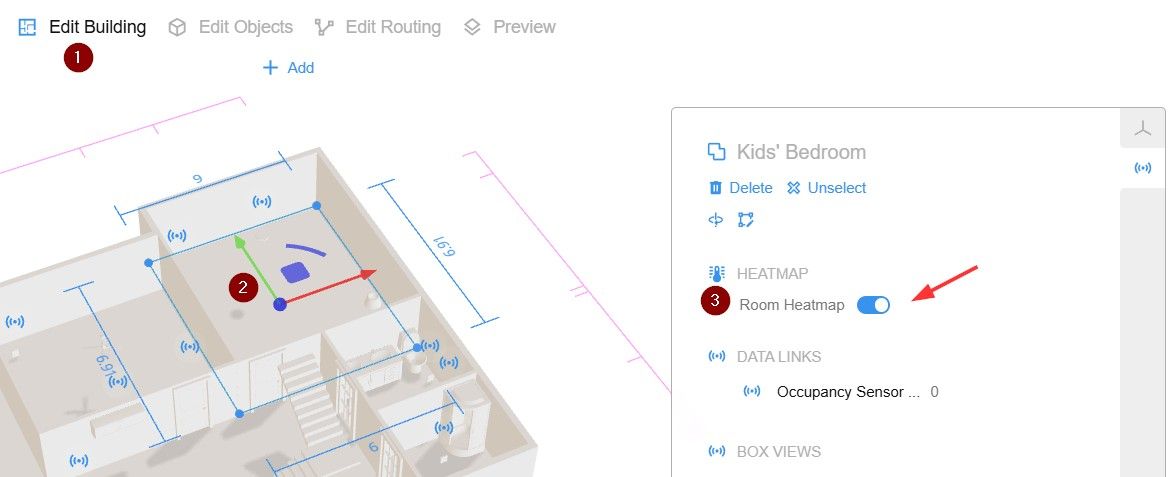
Enable Room Heatmap for an individual room to generate a heatmap using only the sensors assigned to that room, keeping its visualization independent from the surrounding floor-level heatmap.
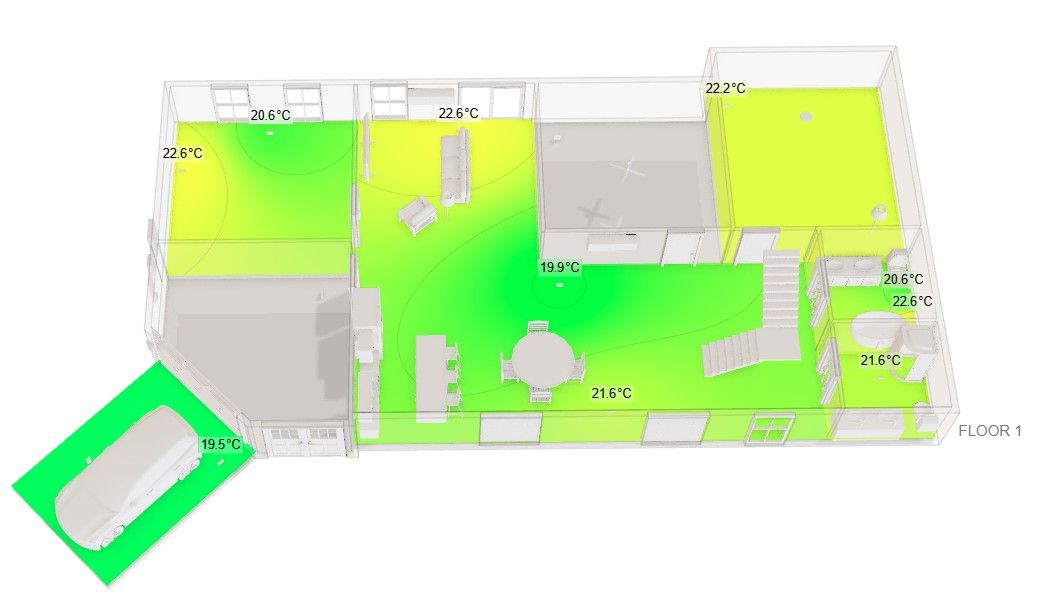
To enable it: In Edit Building, select a room, then turn on Room Heatmap in the Properties panel.
Electrical Routing
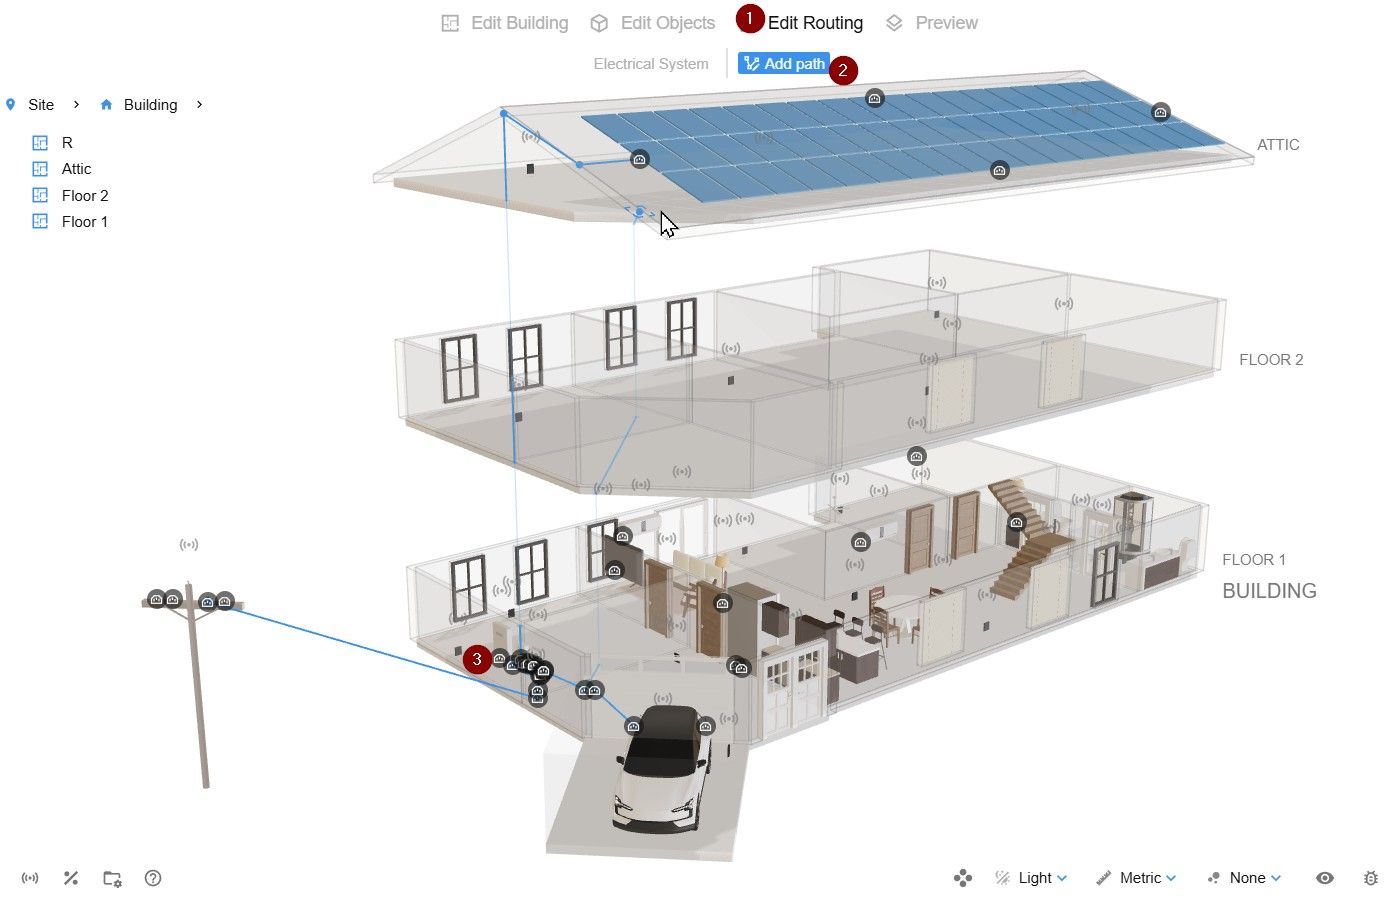
Create visual electrical connections between equipment directly inside the 3D building model. Routing can connect equipment on the same floor, across multiple floors, or between indoor and rooftop equipment. Assign electrical roles to objects to make them available for routing.
This provides a foundation for visualizing electrical infrastructure such as panels, meters, outlets, solar equipment, batteries, EV chargers, and other connected systems.
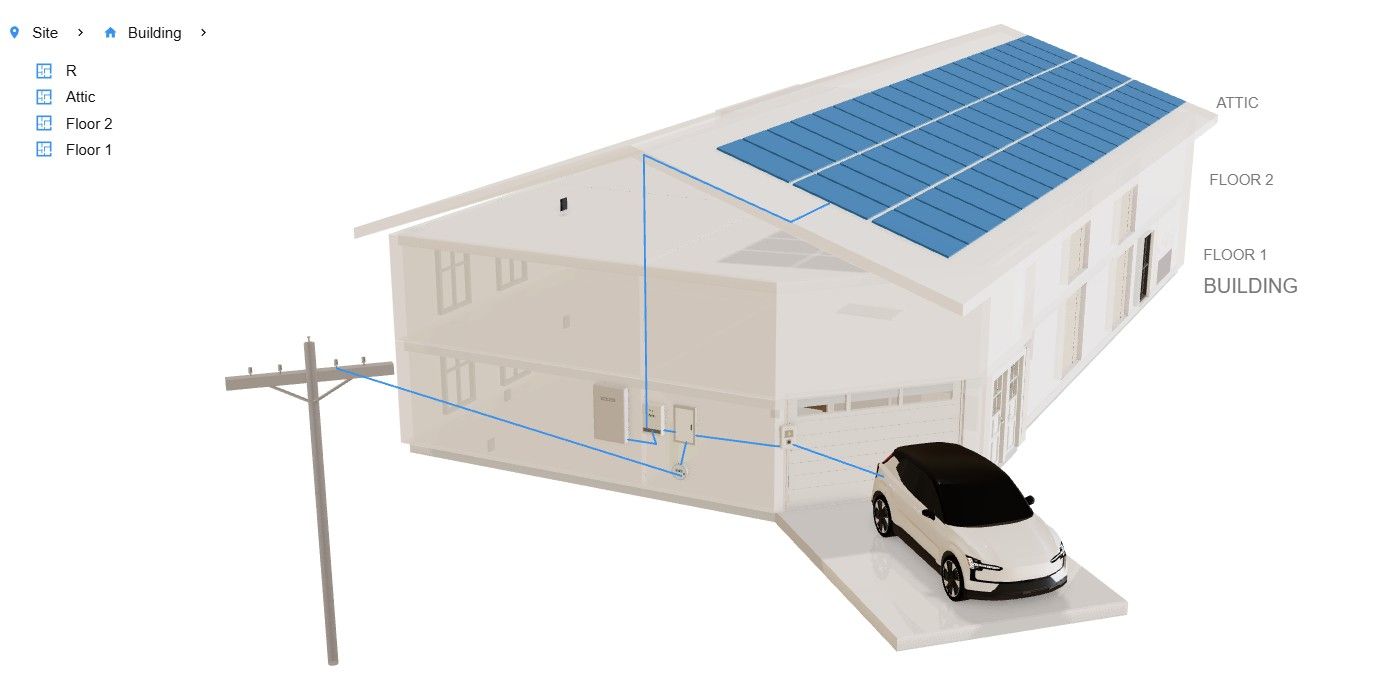
To use it: In Edit Routing, click Add Path, select one port, then select another port to create the connection.
Ground-Level Object Placement
Place supported equipment and other objects directly at ground level around the building. This makes it possible to model exterior infrastructure and equipment that does not belong to a specific floor, expanding Zircon3D beyond the building interior.
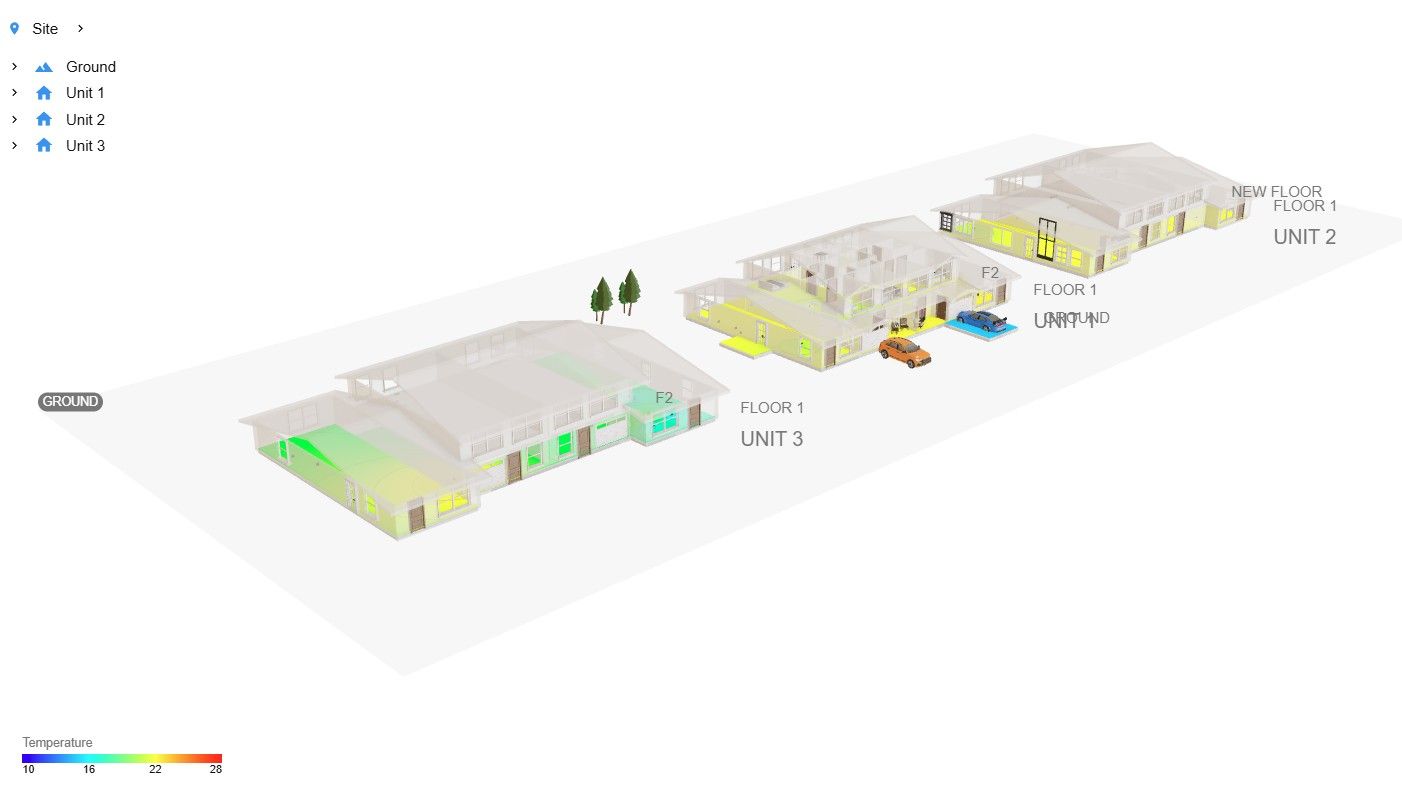
To use it: In Edit Building, click Add and select Add Ground. A ground area is created based on the site view; click the Ground label to adjust its size.Rooftop Equipment Placement
Mount supported objects directly onto roof surfaces.
This is particularly useful for equipment such as solar panels and other rooftop systems, allowing them to become part of the same interactive building model as indoor equipment.
Custom-Sized Solar Arrays
Use the new PV Array object to quickly create configurable solar panel installations. You can customize the number of rows and columns, panel dimensions, horizontal and vertical spacing, and panel and frame materials, making it easier to create solar layouts that better match real installations without placing each panel manually.
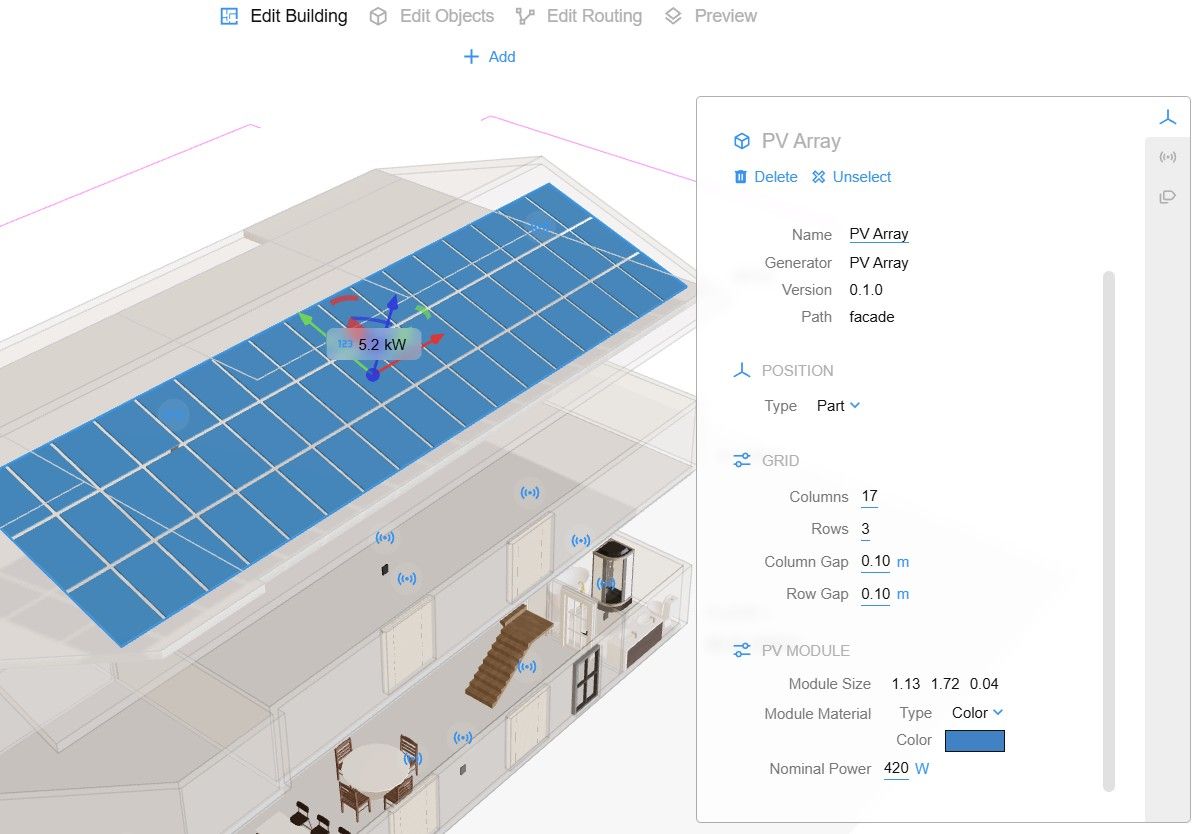
To use it: In the Model Library, find Solar PV Array under Energy & Electrical, then drag it onto the roof or ground. Use the Properties panel to customize its layout, dimensions, materials, and colors.
Custom Room Shapes
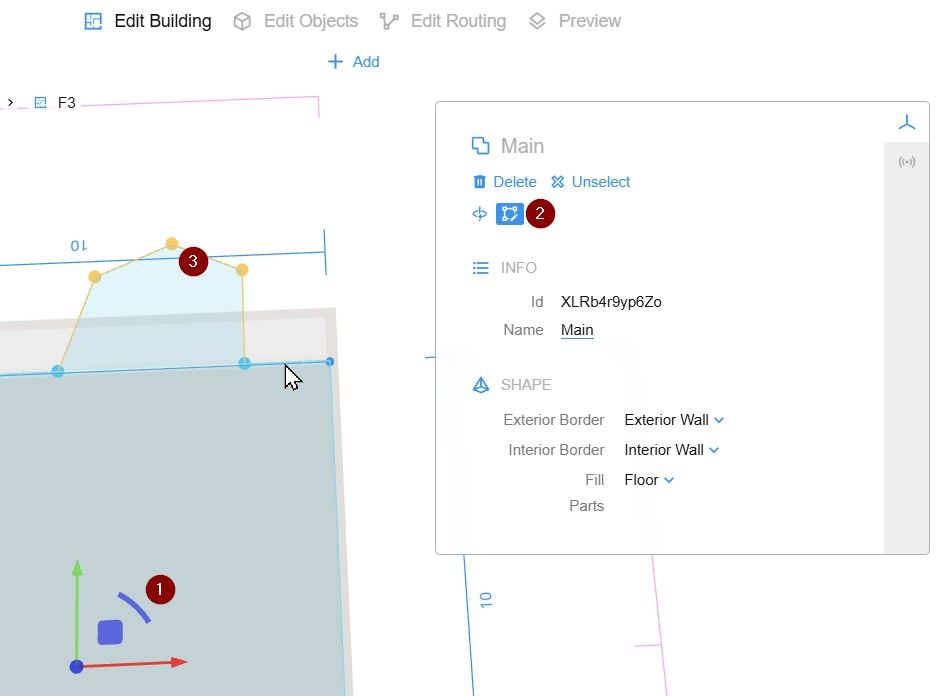
Use Modify shape to create more accurate room geometry by extending existing rooms or cutting away sections for irregular floorplans, alcoves, recesses, and other non-rectangular spaces. Hold Shift while drawing to create edges at any angle instead of being limited to aligned directions.
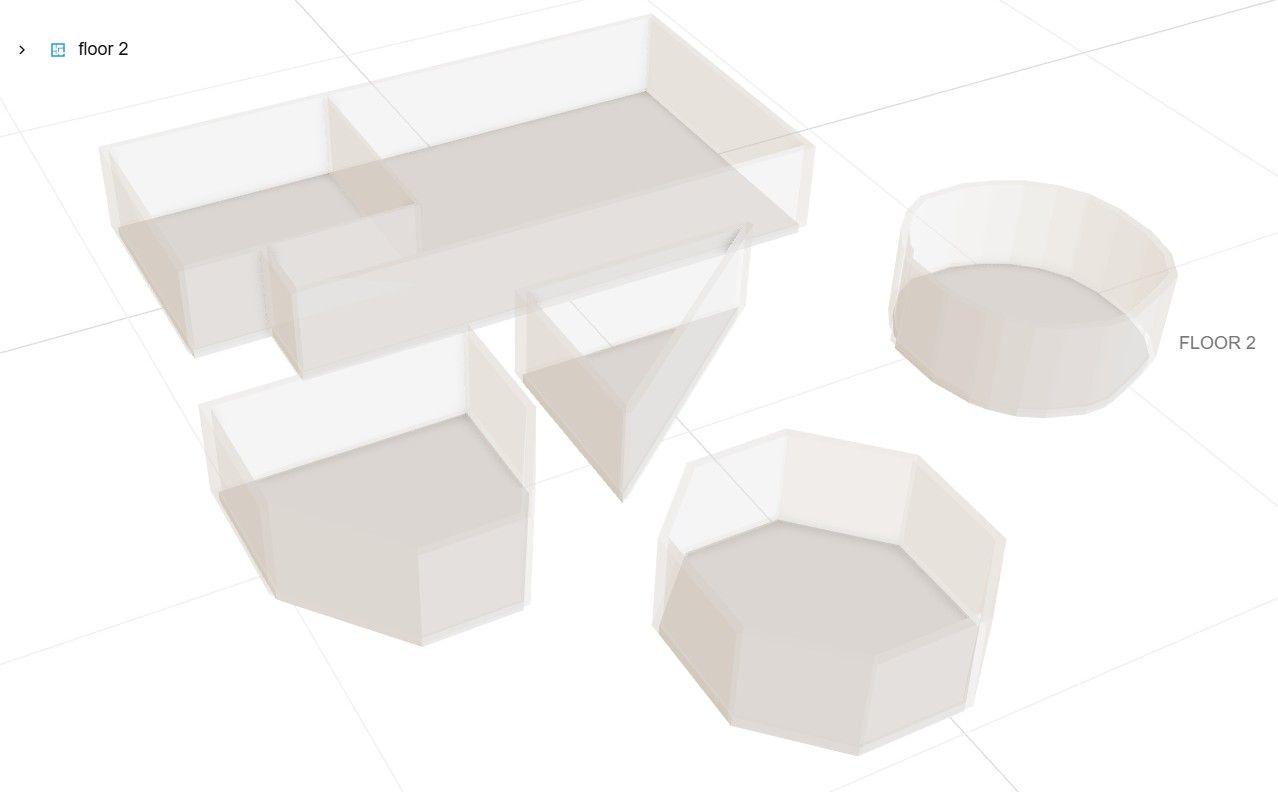
To use it: In Edit Building, select the room, then click Modify shape in the Properties panel. Click an existing edge or corner to start, then add points to define the new outline. Draw outside the room to extend it, or inside the room to cut away a section. Hold Shift while drawing to create edges at any angle.
Copy Rooms and Objects
Create rooms and objects more efficiently with new copy and paste workflows. Hold Ctrl to select multiple rooms or objects, then keep holding Ctrl while dragging to duplicate the entire selection. You can also use Ctrl+C and Ctrl+V to copy and paste. This is especially useful for repeated rooms, equipment layouts, furniture arrangements, and other similar building structures.
Dashboard Enhancements
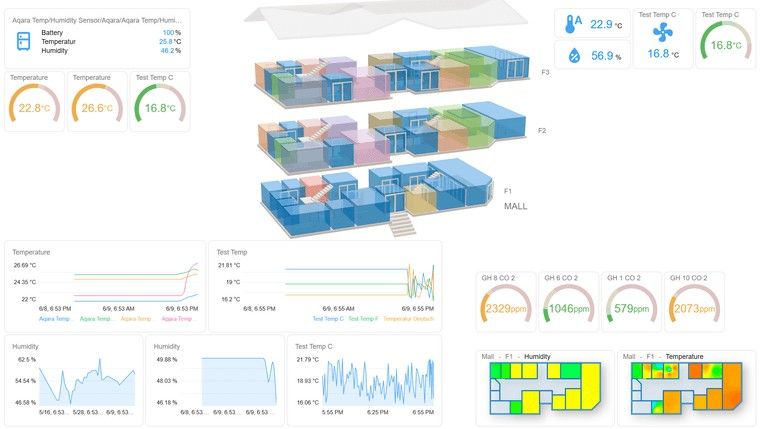
Dashboards receive several major improvements in v3.0, with new visualization options and faster editing workflows:
- View Profile Tile – Add a saved 3D building view directly to a dashboard, including its configured camera position and visualization state.
- History Line Chart – Display historical sensor data over a selected period and compare multiple properties in the same chart.
- Gauge Thresholds – Configure gauge ranges with Yellow and Red thresholds to highlight warning and critical values.
- Custom Property Icons – Choose the icon, color, and position for Property tiles, with additional icons for energy and electrical monitoring.
- Quick Duplication – Hold Ctrl while dragging a dashboard tile to duplicate it together with its existing settings.
Improved Touch Controls
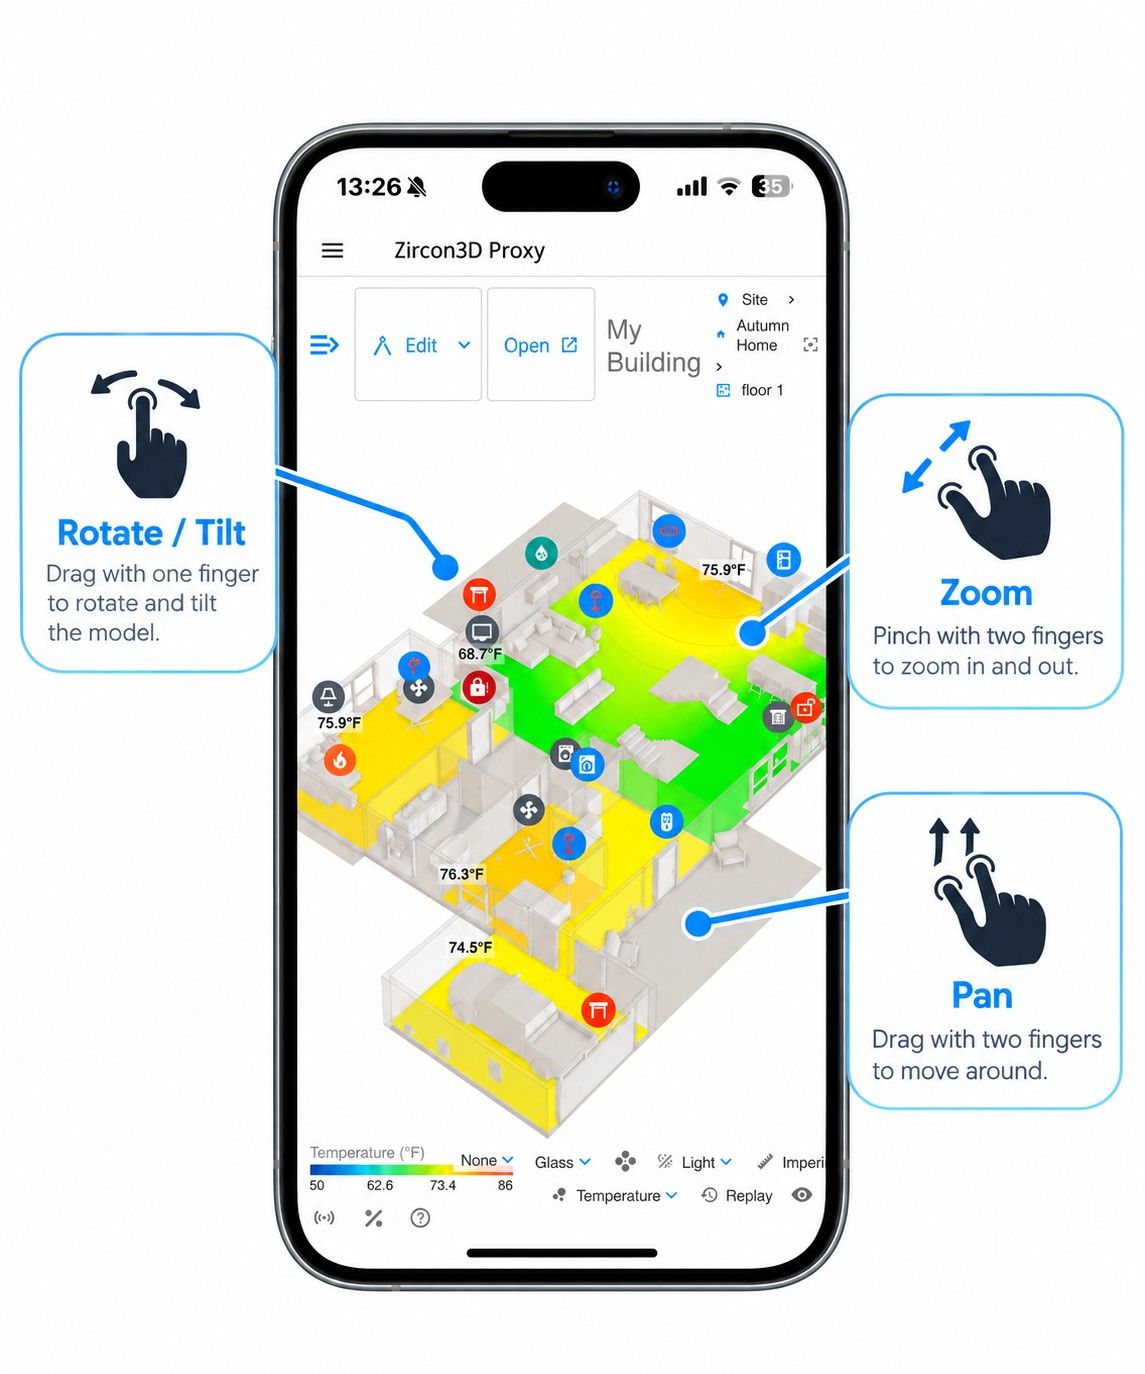
Improved touch navigation on tablets and phones. Use one finger to rotate the floorplan or adjust the view up and down, pinch with two fingers to zoom in and out, and move two fingers in the same direction to pan the view.
Designer Help Menu
Access Designer assistance directly from Help in the bottom status bar.
The Help menu provides convenient access to: Editing hints, Keyboard shortcuts, Official documentation, Video tutorialsImprovements
v3.0 includes a range of usability and visual improvements across Zircon3D. View Settings now provide more control over the 3D scene, including shadow quality, floor reflections, Room Box opacity, and geometry outlines, helping balance visual quality, clarity, and rendering performance across different devices and project types. New Show Ports and Show Routing options make it easier to control electrical routing overlays, with these settings also supported in saved View Profiles.
The Model Library has been reorganized into clearer categories, while device lists are now more room-aware, automatically filtering and updating based on room and device selection. Stair selection has also been refined for easier editing, and new quick-access rotation controls make it easier to rotate selected rooms and objects without relying only on the on-screen position helper. Zircon3D project import and export is now supported, making it easier to transfer projects between Zircon3D applications.
Bug Fixes
Zircon3D 3.0 also includes a range of stability fixes and smaller corrections across the Viewer and Designer. These include fixes related to editing workflows, object interaction, visualization, dashboard behavior, and general UI consistency.
-
T Tami Liu referenced this topic
Hello! It looks like you're interested in this conversation, but you don't have an account yet.
Getting fed up of having to scroll through the same posts each visit? When you register for an account, you'll always come back to exactly where you were before, and choose to be notified of new replies (either via email, or push notification). You'll also be able to save bookmarks and upvote posts to show your appreciation to other community members.
With your input, this post could be even better 💗
Register Login